How to Lay Laminate Flooring Like a Pro
Laminate flooring offers a durable and visually appealing option for many interior spaces. When installed over a concrete subfloor, the process requires attention to specific conditions and preparation steps that differ from installations over wood subfloors. Understanding the characteristics of concrete as a base material helps ensure that the laminate system functions as intended over time.
Concrete subfloors present unique considerations, including moisture management, surface flatness, and thermal properties. A successful laminate installation depends on addressing these factors before the first plank is placed. The following sections outline a structured approach to preparing, planning, and executing an installation that aligns with industry practices and manufacturer guidelines.
By following a methodical sequence that covers subfloor assessment, underlayment selection, layout planning, cutting techniques, and final adjustments, individuals can approach the project with clarity and confidence. The focus remains on process and methodology rather than on guaranteed outcomes, as every installation environment differs.
Preparing the Concrete Subfloor
The condition of the concrete subfloor directly influences the performance of the laminate flooring system. Before any underlayment or planks are introduced, the concrete must be evaluated for moisture content, flatness, and cleanliness. Moisture testing is an essential step, as concrete can retain or transmit moisture through capillary action. A simple moisture meter test or a calcium chloride test can provide information about the moisture vapor emission rate. If readings exceed the thresholds specified by the laminate manufacturer, a vapor barrier or moisture‑mitigating underlayment may be necessary.
Flatness is another critical factor. Laminate flooring requires a subfloor that does not deviate more than 3/16 inch over a 10‑foot span, or as per the manufacturer’s tolerances. Uneven concrete can be corrected using a self‑leveling compound, which is applied and allowed to cure before proceeding. Any high spots should be ground down with a concrete grinder. Additionally, the subfloor must be free of debris, dust, oil, paint, or other contaminants that could prevent the underlayment from lying flat or compromise adhesion if a glue‑assisted system is used. Cleaning with a vacuum and a damp (not wet) mop is typically sufficient.
Cracks and holes in concrete should be repaired with a suitable patching compound. It is also advisable to check for any signs of efflorescence or previous water damage. Addressing these issues at the preparation stage reduces the likelihood of problems emerging after the floor is completed. The time invested in proper subfloor preparation often contributes to a more stable and long‑lasting flooring installation.
Choosing and Installing Underlayment
Underlayment serves multiple functions in a laminate flooring system over concrete. It provides a moisture barrier, helps absorb minor subfloor irregularities, reduces sound transmission, and offers a cushioning effect that can enhance comfort underfoot. The selection of underlayment should be based on the specific conditions of the concrete subfloor and the type of laminate being used. For concrete subfloors, a combination underlayment that includes an integrated vapor barrier is often recommended, as it eliminates the need to lay a separate plastic sheet.
Installation begins by rolling out the underlayment across the entire floor area, with strips running parallel to the direction of the planks where possible. Adjacent strips should overlap by several inches and be taped at the seams using a moisture‑resistant tape. The underlayment should extend slightly up the walls, typically 2 to 3 inches, to create a continuous barrier that can later be trimmed flush with the flooring surface. Care must be taken to avoid tearing or puncturing the underlayment during installation.
Some laminate products include a pre‑attached underlayment pad. In such cases, a separate vapor barrier may still be required over concrete depending on the manufacturer’s instructions. It is important to verify the compatibility of the underlayment and the vapor barrier with the specific laminate flooring product. Following the written guidelines provided by the flooring manufacturer helps maintain warranty coverage and supports optimal performance. Once the underlayment is in place, the surface should be clean and free of wrinkles before laying the first row of planks.
Planning the Layout
Before any planks are cut or clicked together, a clear layout plan helps minimize waste and ensures a visually balanced result. The first step is to measure the room’s dimensions and determine the direction of installation. Laminate planks are typically installed parallel to the longest wall or the main source of natural light to create a sense of continuity. In rooms with irregular shapes or multiple doorways, a layout that minimizes the number of narrow planks at walls and transitions is preferable.
Acclimation is an important preparatory step. Laminate planks should be brought into the installation environment at least 48 hours before installation and stored flat in the same room where they will be laid. The temperature and humidity should be maintained at typical living‑condition levels. Acclimation allows the planks to adjust to the environment, reducing the potential for expansion or contraction after installation.
Expansion gaps must be planned along all walls, columns, pipes, and fixed objects. A gap of at least 1/4 inch to 1/2 inch is commonly recommended, depending on the room size and manufacturer specifications. Spacers can be used to maintain consistent gaps during installation. The layout should also account for the staggering of end joints. A typical practice is to offset end joints by at least 6 to 8 inches between adjacent rows, and to avoid repeating patterns that create a “staircase” effect. By planning the first few rows on paper or with a dry layout, the installer can visualize potential issues and adjust the starting point accordingly.
Cutting Laminate Planks
Cutting laminate planks is an integral part of the installation process, especially when working around corners, door frames, and other obstacles. A few essential tools include a laminate cutter (or a guillotine‑style cutter), a jigsaw with a fine‑tooth blade, and a handsaw for small adjustments. A laminate cutter is typically the fastest option for straight cuts and produces clean edges without dust. For curved cuts or cutouts around pipes, a jigsaw with a laminate‑specific blade is appropriate.
When measuring for cuts, it is important to account for the expansion gap. For example, when cutting a plank to fit against a wall, the measured distance from the wall to the edge of the last installed plank should be reduced by the width of the expansion gap. Using a square and a pencil to mark the cut line helps maintain accuracy. Cutting should be done with the decorative side facing up when using a jigsaw to prevent chipping, and facing down when using a laminate cutter. Always wear appropriate safety equipment, including eye protection and a dust mask, especially when using power tools.
For irregular cuts, such as around door jambs, a technique known as undercutting can be used. A jamb saw or a handsaw is used to cut the bottom of the door frame so that the laminate plank can slide underneath, creating a clean appearance without visible gaps. Similarly, for pipes, a hole is drilled slightly larger than the pipe diameter, and the plank is cut in two pieces that fit around the pipe before being clicked together. Taking time to make precise cuts reduces the need for later adjustments and contributes to a professional‑looking finish.
Installing the Planks
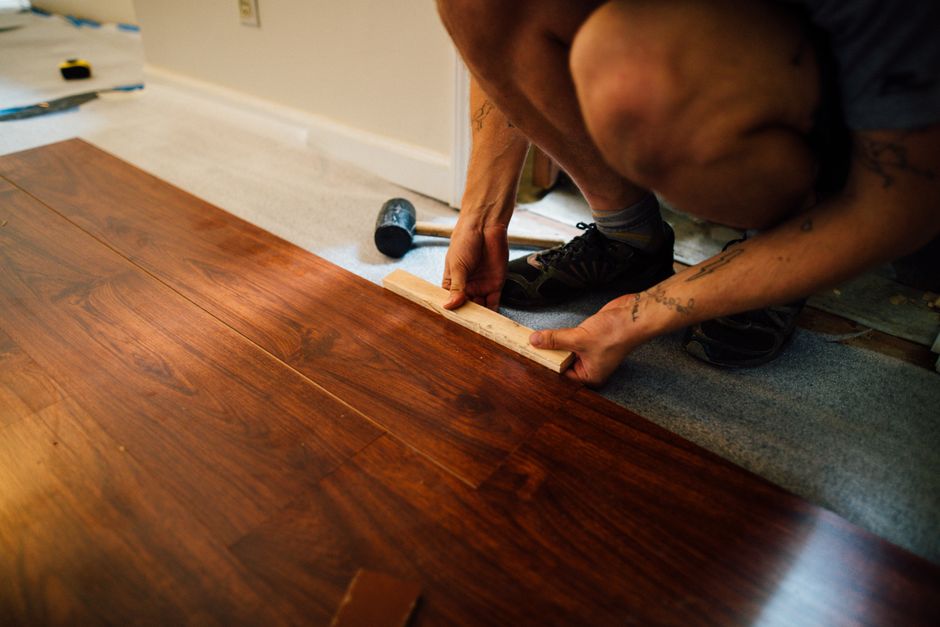
The actual installation process begins at one corner of the room, typically the left‑hand corner of the longest wall. The first row is laid with the tongue side facing the wall, using spacers to maintain the expansion gap. Planks are joined end‑to‑end by inserting the tongue of the next plank into the groove of the previous one at a slight angle and then pressing down until the joint locks. Some systems require tapping the ends together with a tapping block and hammer; care should be taken to avoid damaging the locking mechanism.
Each subsequent row is started with a cut piece from the previous row to ensure staggered end joints. The long‑side connection is made by angling the new plank into the groove of the previous row and then lowering it flat while sliding it sideways to engage the end joint. A gentle tap with a tapping block along the long side may help seat the joint fully. It is common to encounter tight spots near walls where a pull bar is needed to engage the last planks in a row.
As the installation progresses, it is advisable to periodically check that rows remain straight and that expansion gaps are consistent. Small deviations can be corrected by gently tapping planks into alignment. When reaching the final row, the planks will likely need to be ripped lengthwise to fit the remaining space, again accounting for the required expansion gap. The last row is typically installed using a pull bar to lock the planks into place. After the entire floor is laid, the spacers are removed and the expansion gaps are concealed with baseboards or trim, which should be fastened to the wall rather than the flooring.
Finishing Touches
Once the main field of laminate is installed, attention turns to transitions and edge details. Areas where the laminate meets a different flooring type, such as tile or carpet, require a transition strip to create a smooth and safe surface. T‑moldings are used for doorways between rooms of similar height, while reducer strips handle height differences. Thresholds can be used at exterior doors. These transition strips are typically installed after the flooring is in place, with the track or adhesive applied according to the product instructions.
Baseboards or quarter‑round moldings are installed along the walls to cover the expansion gap. It is important not to nail or glue these moldings to the laminate, as this would restrict natural movement. Instead, they should be attached to the wall. After installation, the floor should be cleaned of any debris and dust. A dry microfiber mop or a vacuum with a hard floor attachment is appropriate for initial cleaning.
Laminate flooring requires a period of adjustment to the environment. During the first few weeks, changes in temperature and humidity may cause slight expansion or contraction. Maintaining consistent indoor climate conditions supports the stability of the flooring. By following a methodical approach from subfloor preparation through final trim installation, the process of laying laminate over concrete can be completed with attention to detail and an understanding of how each step contributes to the overall system.